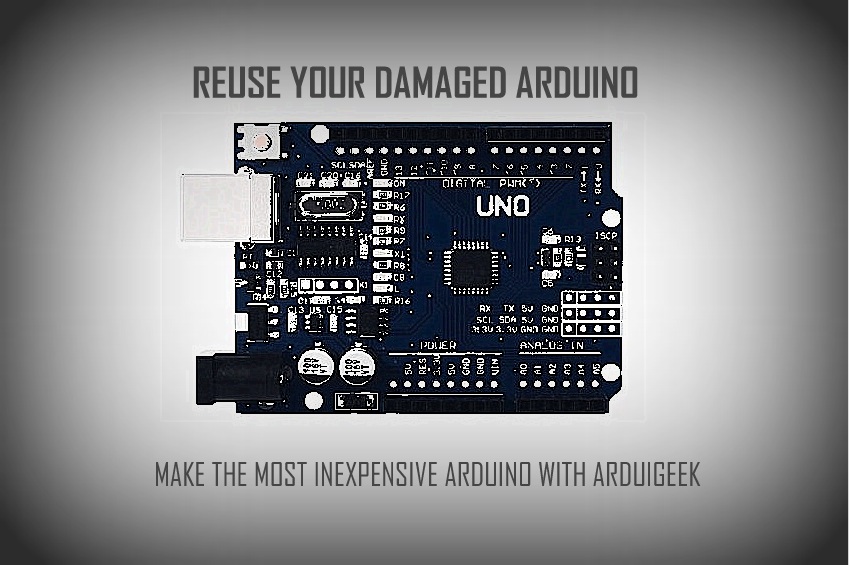
Fried up an arduino lately? This post might just repair your damaged arduino! and even explain how you can MAKE YOUR OWN HOME-MADE ARDUINO in a few easy steps.But, first we must be clear that not every damaged arduino can be reused.As, prevention is always better than cure, read this post to PREVENT DAMAGING YOUR ARDUINO in future. Let us divide the arduino into two circuits.
- Circuit inside the microcontroller: If the circuit here is damaged you can buy a new microcontroller which must be way cheaper than the Genuino Arduino UNO.
- Circuit on the development board: This just means “the arduino without the microcontroller” .If the circuit in this part is damaged, the board won’t work but the microcontroller can be used to make your circuits. One simple way is to use someone’s board whose microcontroller is damaged. Unless off course he hasn’t read my post earlier and asked for the microcontroller from you himself. Fortunately, we do have some other way to get round to it.
From what I have noticed, in 80 % of the times you will have your voltage regulator blown. Let us find out why this happens!
Voltage regulator is a device that checks any excess voltage crossing over to arduino’s delicate circuits. But there is a limit to its voltage limiting capacity. The voltage regulator used by arduino uno is TO223 SMD and its compatible versions are available on eBay. So , if you see a popped up regulator consider yourself in luck! You are about to fix your arduino in quite inexpensive away.
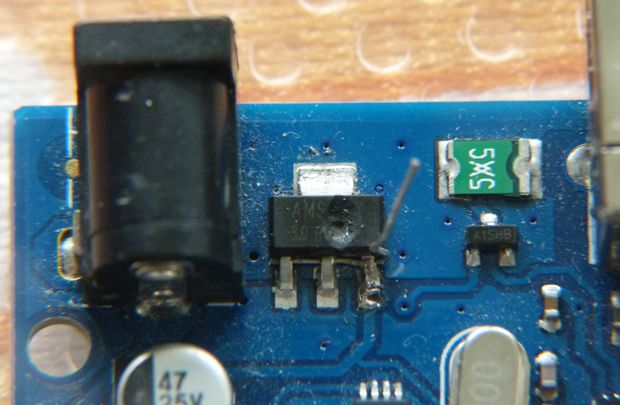
All you have got to do is just replace the faulty voltage regulator with a healthy one. If this doesn’t work , we go and make our own cheap arduino! Yes , you read that right. Now , this whole thing has two major advantages:
- The one made by me is quite cheap compared to Genuino Arduino.
- The circuit is minimal. So, you can design it on PCB and crunch your large projects.
Lets do it.
The components you will need.
| COMPONENT | PRICE IN INDIA IN u.s.d. |
| 1. Breadboard | 4.68 $ on eBay.(Rs. 300). |
| 2. Two 22 pf capacitors | |
| 3. One 100 nf capacitor | |
| 4. 16 MHz crystal | |
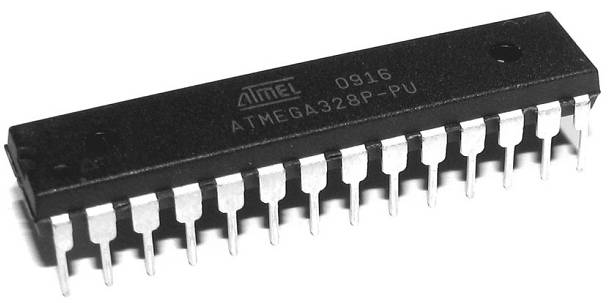
| 5. Atmega 328-pu microcontroller | |
| 6. Serial Programmer(usb to serial converter) | 3.58$ |
| 7. Indomitable spirit of a DIY hobbyist | Priceless |
Total price equals 8.26 $ ( around Rs. 530), while a Genuino Arduino UNO (not the clones )is available at 31.14 $(Rs. 2000).
If you have two arduinos one of which is damaged, you can use the other board to program your Atmega. Just plug the chip into healthy arduino board, set the COM PORT ,program it and then plug it to your project. Blimey! It’s done.
But first you must safely take out the Atmega 328-pu microcontroller ic from your damaged arduino. Make sure you do not damage the pins. Do it slow with a flat-faced screwdriver and please mind the notch!
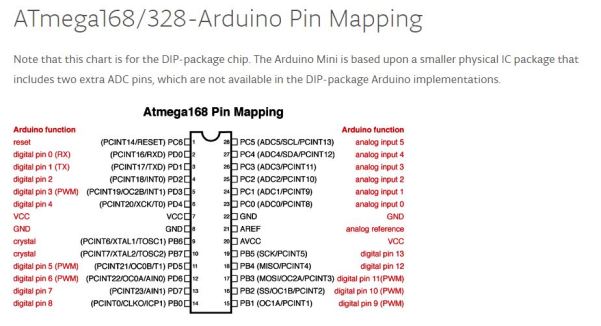
Next important step is to know the pin descriptions. As they look no better than monotonous legs of a millipede, keep the following description in the back of your mind.It’s best if you label it on the ic if you are making a breadboard arduino for prototyping. It should look like this:
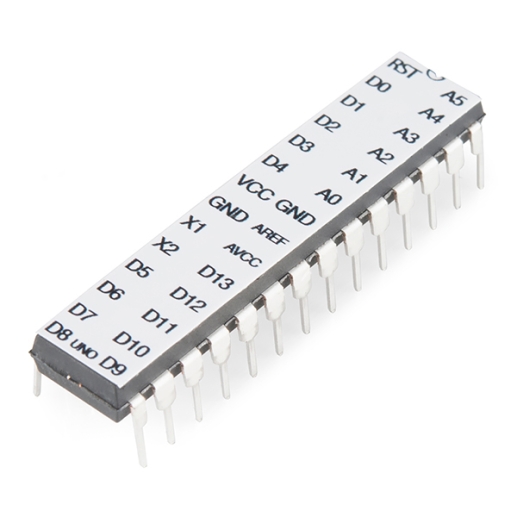
Yes , I get it! It is difficult to understand the pins this way. Next image shall clear the smoke.
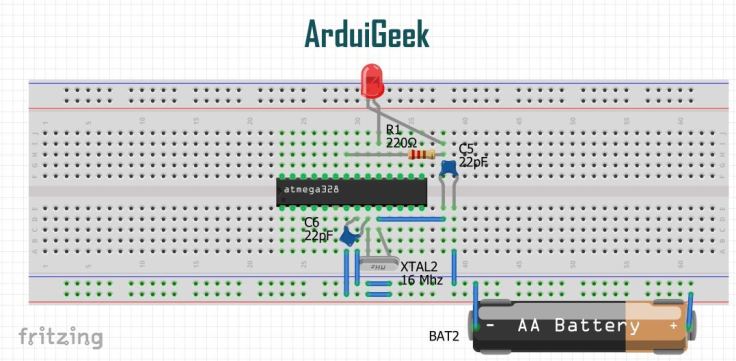
Circuit:
You have to make a very basic circuit before you can run endless projects on your DIY Arduino Tiny. A word of caution here: The power supplied must be less than 5.5 volts.
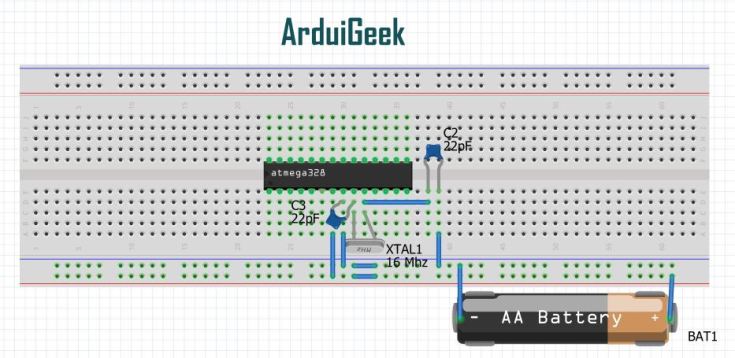
Make this circuit on your breadboard and your Arduino Tiny (minus the programming facility) is good to go. Now , the next logical step is programming the chip. I can hear those voices asking for the port to program the chip.
Programming Circuit:
Your dilemma is, how to command this silicon-brain! Won’t stay for long ,though. There comes your FTDI programmer and the 100 nf ceramic capacitor in the form of a little add-on to this circuit ,in case you don’t have a healthy development board.FTDI programmer is provided with a usb port.Connect the programmer to your laptop using usb cable and the Arduino Tiny shall function at your will.
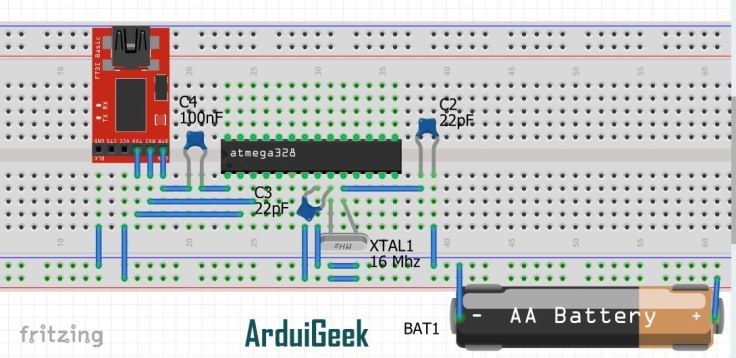
Done with the Programming circuit! You can now remove the programmer and the 100nf capacitor. Time to tinker the hell out of Tiny(Well, that was some alliteration!).
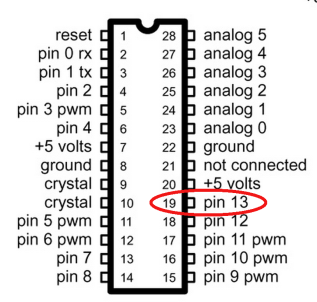
Let’s just start with the sample blink program. All we know is , the arduino IDE sample program works on digital Pin 13.So , we have to connect the led on digital pin 13.Refer to the picture below to find digital pin 13.
Circuit for the Blink program:
Obviously the circuit is quite small, simplified and inexpensive .Moreover , it goes well with your DIY spirit. So, go tinker your home-made Arduino Tiny.

Leave a comment